|
|
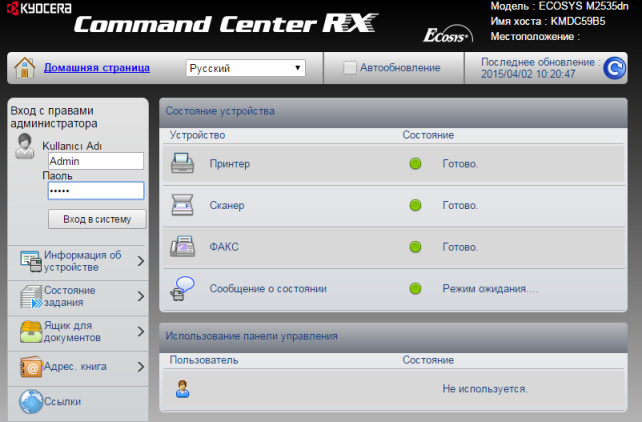
The settings of network scanning are identical for all models KYOCERA ECOSYS M2040dn / M2540dn / M2035dn / M2535dn. Actually, it's pretty simple! It's assumed that device is already configured and works like printer, and automatically got all network settings through DHCP. First, go to web-page of the device by its IP address through a browser. Login required. Login: Admin. Password is the same: Admin. Pay attention capital "A" letters! |
|
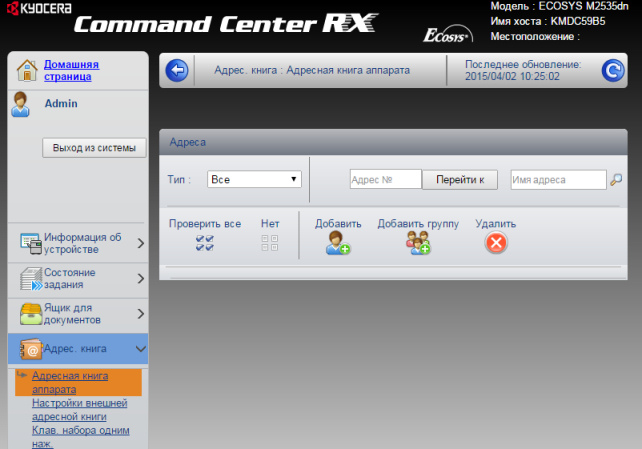 |
On the left in the menu select the Address book item -> Device address book. Then click ADD on the man icon. | |
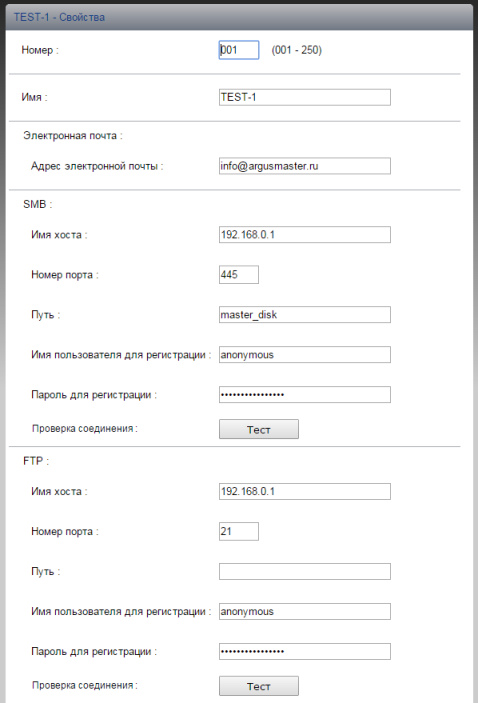 |
All the master settings are namely in this window. More about them. You can register all three channels, as in our example, or choose one of them, depending on your needs. Number: - is any random number. E-mail SMB (network folder) For check you can click the [Test] button. If there are no errors - scan to SMB is configured! FTP For check you can click the [Test] button. If there are no errors - scan to FTP is configured! Save the settings, clicking the button [Submit] at the bottom of the page if everything was done successfully. |
|
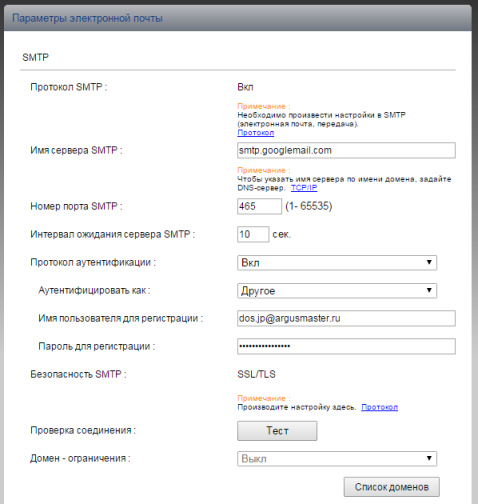 |
On the left in the main menu choose Function settings -> E-mail On this page, you must configure the mail sender. To do this, you need a mailbox, on whose behalf the device will send mail. In our example we used gmail.com and an address on it dos.jp@argusmaster.ru Just fill all the fields as shown in our example, using your mail server information.
Successful scan! |
How to configure network scanning on KYOCERA MFP? Network Scanner Setup Guide.
10 октября 2018